Do you have a food that you’d give nearly anything to have the recipe? That one food that maybe has remained in your memory since childhood, and you just WISH you knew how to make it? For me, the recipes are two items that were served in the cafeteria of the school district I attended as a child: their rolls and their apple crisp. I have searched for these recipes for years and luckily in the last month have found recipes that closely replicate each. It may have only taken near to 20 years to find them, but the wait, oh the wait was worth it. And I can thank the Feisty Foodie for helping me find the recipe for these School House Rolls.
When I accepted FF’s offer of writing weekly posts on baking, I don’t mind admitting I had a bad night or two of worry. Would I be able to have enough about which to post? This led to my hauling out a notebook and writing down all my favorite recipes. Then, I took down every one of my favorite cookbooks and searched through them for baking recipes that caught my eye. And it was this search for recipes that had me going through Pots, Pans, and Pioneers with a fine tooth comb…and subsequently kicking myself for not paying better attention to a cookbook given to me by my mother. Pots, Pans, and Pioneers is one of the definitive cookbooks in our area passed down from generation to generation, but there are no pictures. No glossy photos to ease my cooking nervousness. And for some inexplicable reason, I’ve never pulled it out for baking. DUH!
As I flipped through the pages thinking, “Ooohh, I want to make THAT, and THAT TOO,” my heart nearly stopped when my eyes landed on the recipe for Aunt Lee’s School House Rolls. Holy Crud! That might be the recipe of my bread dreams; those light, sweet, airy rolls that as school kids we tried to steal, bribe, and cajole from one another.
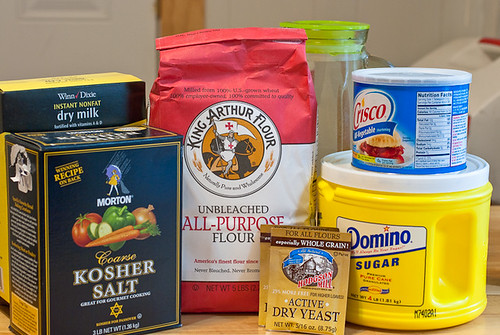
A quick trip to the grocery store and raid of my pantry landed me the ingredients I needed to try the recipe: dry milk, kosher salt, unbleached all-purpose white flour, active dry yeast, sugar, shortening, and plain ol’ tap water. Nothing frilly or hard to find here.
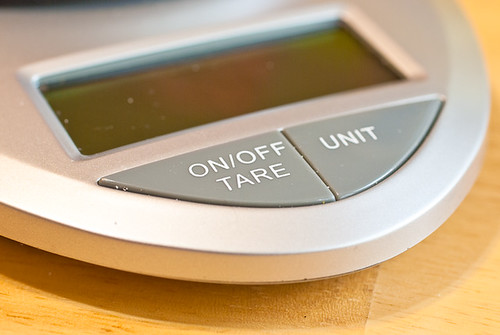
The hardest part came trying to reconfigure the recipe to a smaller sized portion weighed by volume. I’m a big believer in weighing out ingredients for most dough recipes as I feel it ensures success. For this recipe, make sure you have your handy kitchen scale with tare function ready.
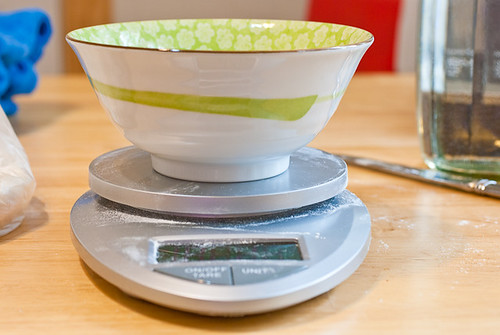
Turn your scale on, and place a container on it. Press the tare button to zero out the scale. Begin adding the ingredient to the container

stopping when you reach the right measurement. As I had to cut this recipe down so much from the original, I measured everything in grams. The original measurements are at the end of this narrative if you wish to see the original cups/tsp measurements.
- 268 grams (g) of unbleached white flour
- 42 g shortening
- 36g of white sugar
- 139g water, room temperature
- 3g active dry yeast
- 17g dry milk
- 2g salt, kosher
For this particular recipe, I measured all ingredients first before starting the recipe. In fact, it is now time to start making these fabulous rolls:
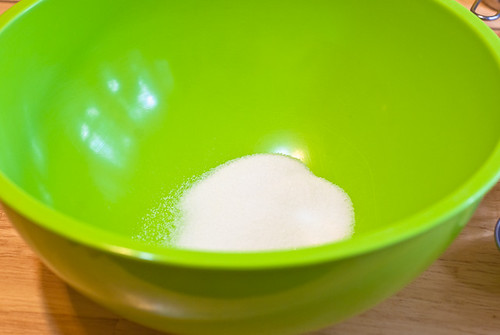
Pour the sugar into a large bowl.
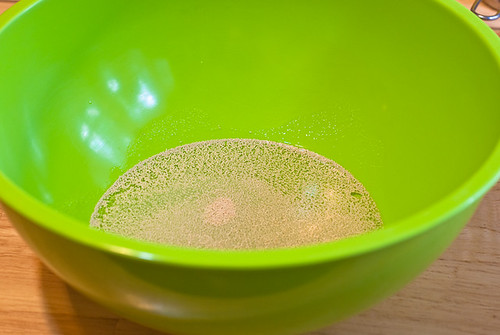
The water and yeast follow. Do not stir. Set the bowl aside and allow the ingredients to sit for about 5 minutes.
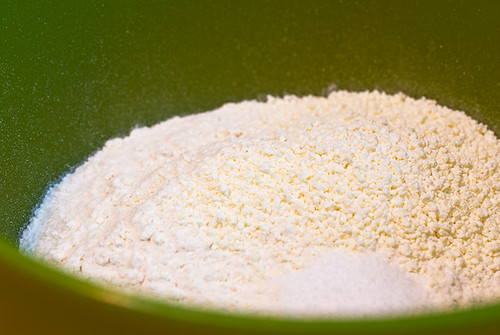
While your yeast/water/sugar rests, we need to combine the flour, dry milk, and salt into another bowl. The recipe calls for these items to be sifted together. I don’t own a sifter. I’ve used one before, but I find them messy and hard to clean as well as a waste of space in my kitchen (I just don’t really like them all that much). However, if you’re a sifter fan, please go ahead and sift these ingredients together.
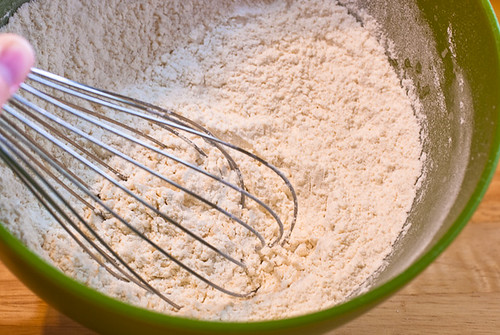
If you’re not a sifter fan or don’t own one, just pull out a whisk and vigourously mix the ingredients. You want to break up any large clumps of flour and be certain the ingredients are well incorporated. You can also sift these ingredients by shaking them through a mesh food strainer (but I find that a bit messy since it seems to leave flour dust everywhere).
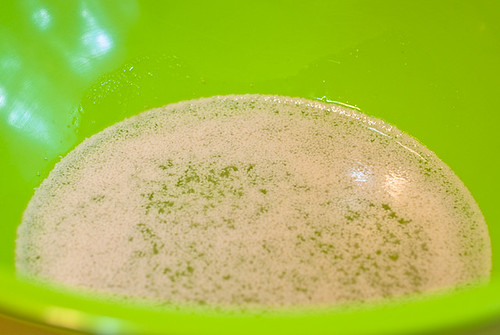
After about 5 minutes, the yeast will soften and start to feed on the sugar. Mine had just started to look like it would begin the foaming process. Since the recipe didn’t call for a full proofing, I stirred the mixture as the recipe called for and went on to the next step.
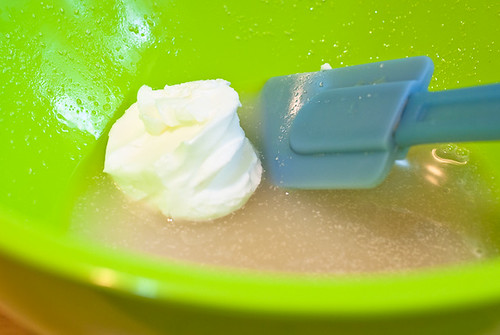
Which was to plop the shortening into the mixing bowl with the water/sugar/yeast. Simple. Next step: beginning to add the flour to the liquid ingredients.
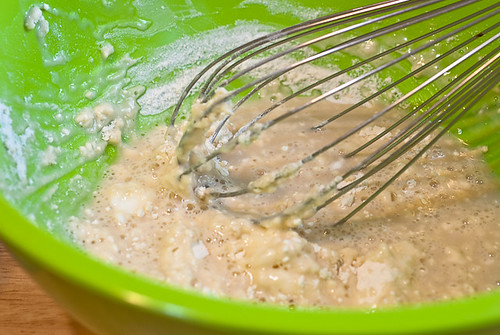
We’re going to add our flour in thirds. Pour or spoon about 1/3 of the dry ingredients into the bowl and with your whisk give everything a swoop or two around the bowl. You’re not really looking to mix your ingredients. Just to begin to introduce them, and let them get to know each a little better.

Pour in your next third and remove the whisk from the bowl. Otherwise everything will glob into the whisk and cause you problems (I’ve done this experimentation for you to save you the trouble.) With a spatula, give another swipe or two around the bowl. Or feel free to use your hands if you prefer not to dirty another utensil.
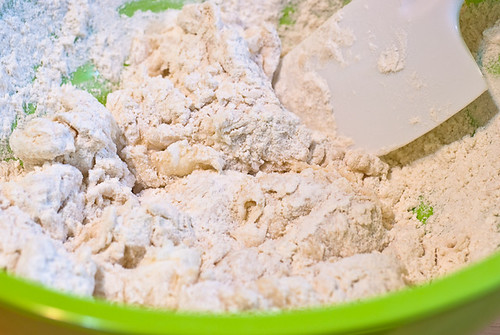
Finally, pour the last bit of flour into the bowl. With your hands or spatula, start to mix and slightly knead the ingredients together.
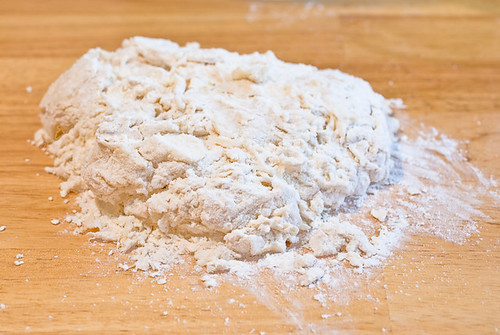
Once things seem like a crumbly dough is forming, turn out the dough onto your work surface.
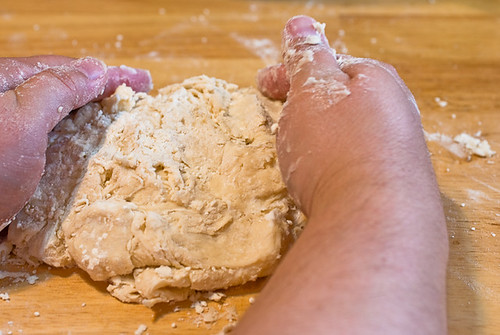
Kneading the dough is pretty simple. Place both hands on either side of the dough and sort of squeeze your hands towards each other a bit.
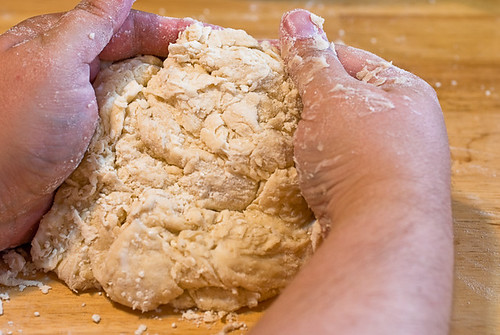
Lift up the dough and fold it in half.
Press down on what you folded over. Repeat. Be sure to scoop up any crumbly bits and loose flour into the dough as you knead it. (And if you’re wondering how I achieved these pictures, my camera remote now needs a cleaning and the timer function was a big help.)
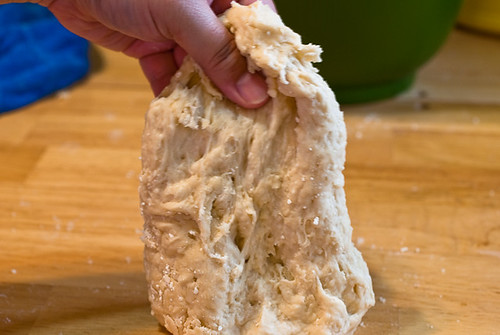
As you knead, you’ll find the dough is going to turn from a floury, loose, crumbly mixture to a stickier, smoother dough that has some elasticity to it.

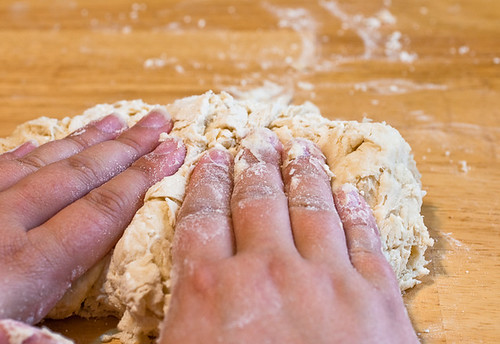
If things get a little too sticky on your countertop, add a wee sprinkle of flour to your work surface, place your dough ontop and continue to knead. Don’t add too much flour as you don’t want to upset the balance of your dough. You just don’t want it to totally stick to your countertop.
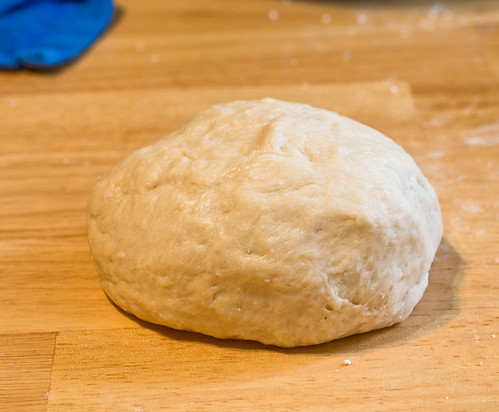
You should finish with a nice, smooth dough ready for rising. It took me about 5-7 minutes to knead this dough. It is a really quick dough that comes together easily by hand. No Kitchen Aid necessary for this recipe.
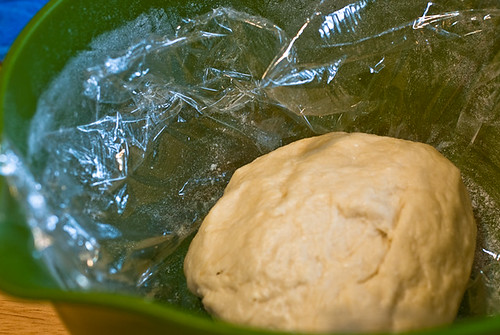
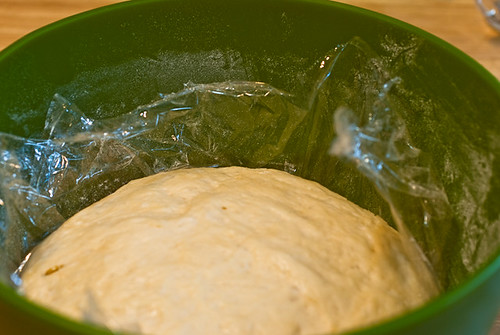
Throw your dough into a bowl…
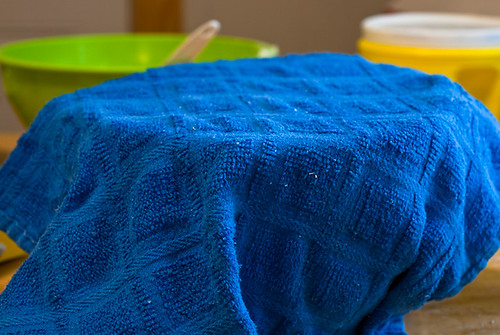
and cover with a towel or plastic wrap. Allow the dough to rise in a warm place until it doubles in size. This first rise is going to take about an hour or so (for me it was about 75 minutes…Louisiana heat is good for something apparently).
Once the dough has risen to about twice its original size, remove it from the bowl and weigh it. My dough weighed around 18 ounces.
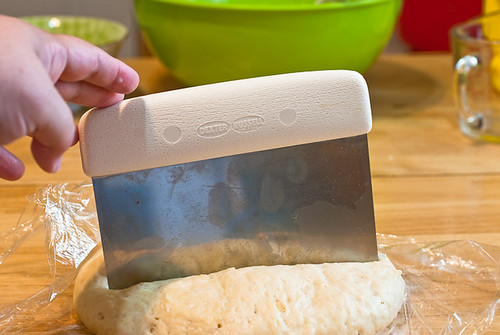
Using a dough blade, cut and weigh the dough into 8 equal-ish portions and roll each into a ball, making rolls. If you don’t want to weigh everything, you don’t have to do so. Just eyeball it. You can also cut the dough with a butter knife (just spray it with a bit of non-stick to help it along).
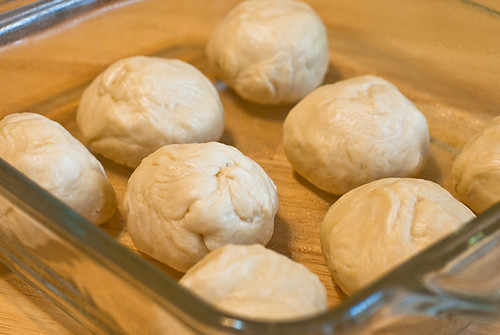
Place the dough rolls on a baking dish (I had this square one available). Cover the dish with a towel or plastic wrap and return to that warm spot. It is now time to allow the dough to do its “second rise.” Again, you want the dough to rise to about twice its previous size. For me, it took the same amount of time as before. After the second rise, it will be time to bake the rolls.
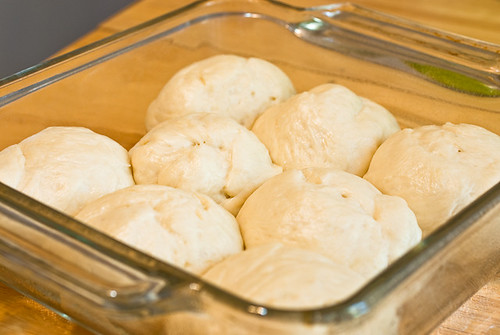
Heat your oven to 400 degrees. Once the oven is heated to the correct temperature, remove the towel (or plastic wrap) and bake the rolls at 400 degrees for 12 – 15 minutes. Right before they are finished baking, melt 1-2 tablespoons of butter (depending on how much you like butter).
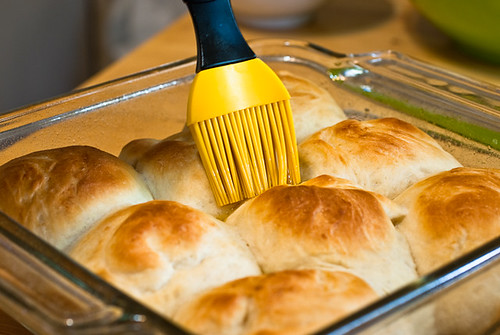
When you take the rolls out of the oven, they should be nicely brown on top and bottom. Brush the melted butter over the rolls generously.
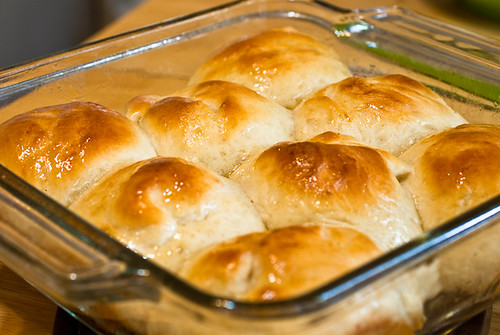
Your rolls will smell fabulous, the glistening melted butter will beckon you, and you will have to do the toughest part of bread baking at this moment. You will have to walk away. That’s right. Walk. A. Way. It’s hard people, but it’s a must as bread continues to bake a bit (especially the centermost part) for quite some time after removing from the oven. Bread like this needs to rest for about 10-15 minutes.
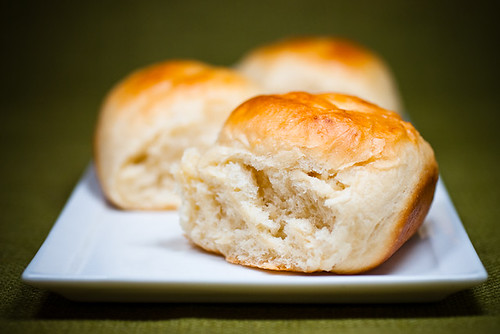
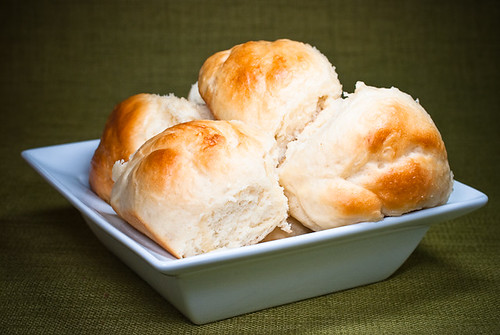
Once rested, you should be left with a soft, sweet dinner roll that is great with butter. This is the sort of roll I like to eat with spaghetti or peanut butter and honey (probably due to good childhood habits and memories).
For those of you who would rather measure out by cups, here are the measurements from the original recipe. It will make a larger batch of rolls.
- 2 cups water, lukewarm
- 1/2 cup sugar
- 2 tbsp active dry yeast
- 3/4 cup shortening
- 1/2 cup dry milk
- 1tsp salt
- 6 cups of flour
If you make them, I hope they help you create your own good memories!
Happy Baking, everyone! ~Jenn of Not Exactly Bento
School House Rolls
from Pots, Pans, & Pioneers, vol IV, 1993
Ingredients
- 268 grams (g) of unbleached white flour
- 42 g shortening
- 36g of white sugar
- 139g water, room lukewarm
- 3g active dry yeast
- 17g dry milk
- 2g salt, kosher
Mixing and Kneading the Dough
- Pour the sugar into a large bowl. The water and yeast follow. Do not stir. Set the bowl aside and allow the ingredients to sit for about 5 minutes.
- While your yeast/water/sugar rests, sift together the flour, dry milk, and salt in a separate bowl. After the yeast/water/sugar has rested for 5 minutes, stir the mixture a few times, and add the shortening to the bowl.
- Add 1/3 of the sifted flour mixture to the liquid ingredients. With a spatula, fold the flour into the liquid ingredients. Just a couple of folds will do.
- Add the second 1/3 of sifted flour mixture to the bowl and repeat the folding process.
- Add the last 1/3 of sifted flour mixture to the bowl. With your hands, mix and slightly knead the ingredients together.
- Once things seem like a crumbly dough is forming, turn out the dough onto a flat work surface.
- At this stage, the dough should be very floury, which should protect the dough from sticking to the work surface.Knead the dough. It will turn from a floury, loose, crumbly mixture to a stickier, smoother dough that has some elasticity to it.If things get a little too sticky on the work surface, add a wee sprinkle of flour to the work surface and place the dough ontop.
- Continue to knead. Kneading may take 5-7 minutes.
- Place the kneaded dough ball into a bowl for the first rise.Cover the bowl with plastic wrap. Place the dough in a warm spot to rise until it doubles in size (about an 60 to 90 minutes)
Shaping the Dough into Rolls
- Once the dough has risen to twice its original size (the first rise), remove it from the bowl and back to the work surface.
- Using a dough blade, divide the dough into 8 equal portions. This can be be done as a rough divide by just cutting the dough into what looks like equal portions or an exact divide by weighing out the portions.
- Once divided, roll each portion in your hands into a roll shape.
- Place the dough rolls on a baking dish. Cover the dish with a towel or plastic wrap and return to the warm spot for the second rise.
- Allow the rolls to double in size on the second rise.
- After the second rise, it will be time to bake the rolls.
Baking the Rolls
- Preheat the oven to 400 degrees. use an oven thermometer to check the temperature if needed.
- Once preheated, remove the towel (or plastic wrap) from the rolls.
- Place the rolls, in their baking dish, in the preheated oven. Bake for 12 – 15 minutes.
- A few minutes before the rolls are finished baking, melt 2 tablespoons of butter.
- Once baked, the rolls should be nicely brown on top and bottom.
- Brush the melted butter over the rolls generously.
- Allow the rolls to rest for 10-15 minutes to finish their baking process.
- Enjoy!
TT says
nice rolls!
Jenn says
Thanks. 😉
CT says
Looks delish and love the step by step instructions and pictures with a summary at the end…very helpful!
Also, since I’m incapable of doing the math… how much did you reduce the original recipe by? (ie. About how many would the original recipe make?) Thanks!
Jenn says
I reduced this recipe by about 1/3. The 268 grams of flour is roughly 9.5 ounces which translates into approx. 2 cups of flour for my particular measuring cup. The original recipe should make about 2 dozen rolls, depending on the size of the roll you shape.
I weighed this recipe by grams as when I got to things like yeast, .10 ounces of yeast seems a pain, and really picky to me. Grams are simpler for that reason, and I wanted the whole recipe to be the same type of measurement…and I’m rambling.
SugarButter says
You had me at butter. This looks so good, thanks for sharing it!
Jenn says
Butter makes everything better, doesn’t it? 🙂
Thien-Kim says
I’m going to make it this weekend, along with some honey butter!
Jenn says
Enjoy my dear friend. Let me know how they work out for you.
T.C. says
Fresh rolls sounds great. None of that pillsbury stuff.
I’d eat ’em with spaghetti too and possibly grape jelly and mo’ butter. Heck, fried chicken!!
Jenn says
oooh, they would be very good with fried chicken. Though I just made homemade brown and serve rolls that I think would work even better with fried chicken. Now, I want fried chicken.
Amber says
Ooh! These remind me of the ones we used to have at my high school in MS. I will be making these this weekend. Thank you for the recipe and for the great step-by-step.
Jenn says
Let me know how they work for you!
Katie says
They look lovely!
Jenn says
Thank you. 🙂
jay says
Those look beautifully fluffy.
Jenn says
Thanks. 🙂
skippymom says
We grew up on these. When my grandma passed away it fell to me to recreate them. It is almost the same recipe [she called the “sweet dinner rolls” because of the sugar and I went in search of the recipe.
As I said, almost the same, except we use regular milk [and my grandmother used lard – which we can’t find anymore]. The coolest thing about the recipe is it is so adaptable. We use the same recipe, add mace and make “kinklings” – which are fried doughnuts. They are so, so good.
Another thing I use the recipe for is hamburger and hot dog rolls. Just shape to fit.
Nicely done. I am glad you have a childhood memory back. I wish schools still cooked like this – I might let my kids buy lunch like I used to.
Jenn says
Great additional suggestions. Thanks for sharing.